Back to School Bag Tags

It's time to make tags for those backpacks & lunch boxes again. This year I wanted something EASY since I no longer have access to all of my awesome stationery printing equipment and I wanted something FAST cause time is flying by and I have way too much to do before school starts! I didn't want to design something on the computer and I didn't want to plug in the laminator. This is what I came up with and it only took me about 30 minutes to complete the project...
SUPPLIES:
Cardstock Paper
A Computer & Printer
Scissors
Scotch Self-Laminating Pouches

This is what the pouches look like. You can buy them at Walmart, Target, Office Depot and many other places.
Directions:
First of all, I found this great blog... Finding Nana.
Have you been there?
It's a really super cool blog and I found these awesome FREE Chevron Printables.
The cool thing is that the chevron rectangles are already sized perfectly for the bag tags. All you have to do is download either a PDF or JPEG file (depending on what your computer program desires). I use "Printmaster" to create all my design stuff but you can do this on iDraw, Paint, Powerpoint, Word, etc... All you have to do is import the picture into your program (that's the chevron file you downloaded) and add text (the name you want to print) Pick a cute font and center it all and VOILA... you're ready to print.
Print your file on CARDSTOCK. This is important because it will make the tags STURDY!

I printed all of my colors even though I only needed a couple for tags. I found that these will make great "calling cards" as attachments to gifts, etc throughout the year.

Next, cut your chevron rectangles along the edge. I used my handy little paper cutter but this is not much cutting and scissors will do the trick just fine.

After you get them all cut out, open your pouch like this.

Center your tag (face down) on the hard plastic. Make sure you have the same amount of clear space at the top and bottom edge.


When you're done, seal it really well by running your fingernail along the edges. 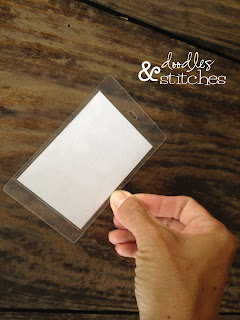


Then take your plastic loop (it comes with the badges) and run it through the slit at the top.

Then loop it through the middle.


Then pull it tight (this is the same way you will also attach it to the bag). Here it is on their backpacks...


(top backpack from Target and bottom backpack from JCPenney)
BACK TO SCHOOL!
The summer's been so wonderful and I've enjoyed having time with my kids and not having a routine!
Back to school... back to bedtimes... back to alarm clocks... back to homework...
I could go on and on and on but I won't cause I've got too much to do!


These are great! Didn't know about the Scotch products, good to know now, thanks.
ReplyDelete