Pages

How to Crochet a Four Leaf Clover

Pin It Now!
How fun would it be to hand these out on St. Patrick's Day?
...OR pin one on your shirt on St. Pat's Day?
…OR make a green striped beanie with these attached? (Pattern coming next week!)
…OR make an adorable four leaf clover headband? (Pattern coming next week!)

These are so easy to crochet.  I like to be busy doing something even if I'm just watching television. So a few nights ago, I started crocheting these little cute clovers in front of the t.v. and before I knew it, I had a ton!  I came up with some cool ways to use them...  I'll be sharing those next week.
For now, here's the pattern…

FOUR LEAF CLOVER PATTERN

Make a magic ring
Chain (ch) 1
Single Crochet (sc) into the ring 5 times.
Tighten the magic ring.
Slip stitch (sl st) closed at first sc.
In the first sc…
ch 1 
half double crochet (hdc), 
3 double crochet (dc)
hdc
(all of that was in the first stitch)
Now sl st into the second stitch and in the second stitch…
1 hdc
3 dc
1 hdc
Now for your STEM... sl st into the 3rd stitch, then ch 4, sc in 2nd and 3rd bumps from the hook, 
sl st back into the 3rd stitch
Now in the 4th stitch…
1 hdc
3 dc
1 hdc
Now sl st into the 5th stitch and…
1 hdc
3 dc
1 hdc
Sl st into first chain and tie off.

UPDATE…

Here are the projects links that I posted using this tutorial…


Pin It Now!

March Prayer List - Printable

Pin It Now!

March Prayer List- Printable

Another free printable for the Resolution Notebook. 
Simply click on the image and it will take you to the download page.


 Here are all of the monthly prayer list printables


Pin It Now!

Salsa Triscuit Snacks

Pin It Now!
This is a NO BRAINER!
It's such a satisfying, easy, fast snack.  My mom taught me this trick.

Cracked Pepper & Olive Oil Triscuit Crackers
(Regular Triscuit Crackers will work too)
A dollop of Salsa
A sprinkling of Reduced-Fat Shredded Mexican Cheese

Microwave for 30 seconds or until cheese melts and gets all bubbly!


Pin It Now!

Shell Stitch Crochet Hat

Pin It Now!
Isn't my baby girl so cute?
This is such a fun hat.  I made it in about half an hour.
I found the pattern HERE… 
It's from the blog, Grow Creative
This pattern is very well-written and easy to read!


Pin It Now!

Mexican Restaurant Cheese Dip

Pin It Now!
 I love the cheese dip at all mexican restaurants.  
As a matter of fact, I tried to duplicate it several times over the years but always failed miserably!  
I am super excited to have finally figured out this recipe and now I am sharing it with you.  
I hope you ENJOY!  

Mexican Restaurant Cheese Dip Recipe

3 tablespoons butter
3 tablespoons flour
1/2 tsp salt
1/8 tsp pepper
1/2 c. milk
1 can mild Ro-tel tomatoes
1 c. grated mexican cheese blend

Melt butter; remove from heat.  Stir in flour, salt and pepper.  Stir in Ro-tel and milk, using a whisk until well blended.  Cook over low heat, stirring constantly until thick.  Cook for 5 minutes, then add cheese.  Stir until smooth. 
Serve with tortilla chips.
Makes 2 cups.
Pin It Now!

Gift Wrap Modge-Podge Table

Pin It Now!

Picture Tutorial

I'm so pleased with how my little table turned out!

This is what it looked like before (below).
I hand painted all those little diamonds on the table 10 years ago.  It was adorable.
But serving as a painting, building, sewing, art table for the past several years…
it had taken some definite abuse!

 I needed to re-vamp this table so I started out by painting it with ASCP "old white"
But I wanted to do more so...
 I found adorable gift wrap at Home Goods.  Isn't it soooo cute?
I started out by measuring the surface of the table 
and then cutting the paper a little larger than the table top.
Using a sponge brush, I applied a HEAVY coat of Modge Podge to the entire table top.


Then, I applied a heavy coat of Modge Podge to the under-side of the wrapping paper.


I placed the paper on the table, very carefully.
Then, I used a (dry) foam roller and pressed the paper to the table, working out any bubbles.
Then I smoothed the surface with my plastic silhouette card.  You can use a credit card. 
This helped to work out all the air from beneath the surface.

After I had the paper smoothed out, I used a sand paper block to remove the edge of the paper.
Then, I applied an even coat of Modge Podge to the paper's surface.
I let it dry for about 20 minutes and then reapplied the Modge Podge.
 The following morning, I covered it with Polyurethane, as a sealer and top coat.
I am so happy with the results!


Pin It Now!

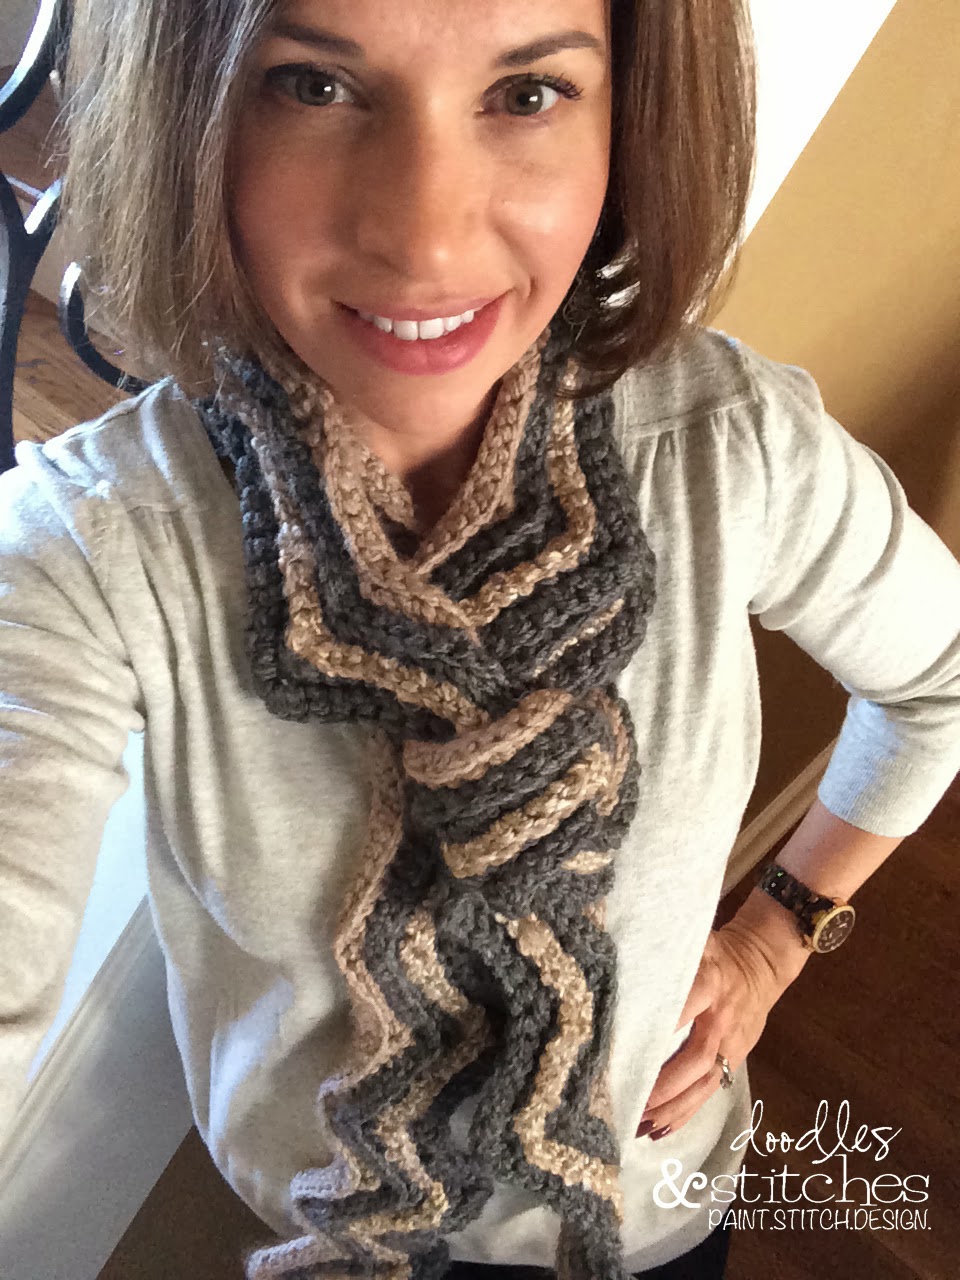
Crocheted Ripple Scarf

Pin It Now!
I found a great blog called "Attic 24" where I learned this "Ripple" crochet pattern.
Here's the link.
I made this cute scarf and am currently working on an afghan using the same ripple.
Here's the scarf worn three different ways...


Pin It Now!

Apple Crisp In A Mug

Pin It Now!

Place the following in the bottom of coffee mug…
1/4 c. applesauce sprinkled with a dash of cinnamon and salt

In a separate dish, mix the following...
1 tbsp. butter
1 tbsp. brown sugar
2 tbsp. self-rising flour
1 tbsp. quick cook raw oats
1/4 tsp. cinnamon

Sprinkle the above mixture on top of the applesauce and cook in microwave for one minute.
Be careful because it's HOT!

Easy and Delicious!


Pin It Now!

Easy-Sew PJ Pants

Pin It Now!
 I made 5 pairs of pajama pants in one afternoon last week!  Can you believe that?

What you need:
2-3 yards of flannel fabric
1/2 inch elastic (measured to your waist size)
pattern (found below) or…
 use your own by simply folding your favorite pj pants as shown and using them as a pattern.

Here's my homemade pattern, it's in a jpeg format and it's 8 pages.
Here's a link to each printable page:
page 1     page 2     page 3     page 4
page 5     page 6     page 7     page 8


I got my fabric at fabric.com.  They have a great assortment of flannels.  
I think most of these prints are by Riley Blake.  
I get no kickbacks from telling you that.  
Fabric.com is just a good fabric source, for your records.

I ordered 2 yards for each pair of pjs but I'm kinda short and so are my daughters so you might need a little more if you are making these in a larger or longer size.
2 - 2.5 yards will make a pair of small sized pajama bottoms (same as Gap or Old Navy size small)


1. Print your pattern and tape it together as shown.  Then cut it out.
Take your fabric and fold straight.  
Then lay the straight edge of pattern along the folded edge of fabric. 
(see below - my pattern was originally made on brown paper)

 2. Take your pattern and turn it over and fold your fabric again, repeating the same cut with opposite side of pattern.  After cutting, this is what you will have...
 3. Take both pieces of fabric and open them up, place right-sides of fabric together as shown below.
 4. With the two fabrics facing each other, sew along the curved areas shown below.
 5.  Now, open up your fabric and line up the pieces you just sewed in the center.
They will now look like a pair of pants.  Sew the area shown below.
 6. Now, turn the top edge of your waist under 1/4" inch and sew all the way around, then turn it down 3/4" and sew around again - leaving enough room for elastic to fit inside (about 1.5 inch gap).  
Do not sew completely closed.
 7. Leave a space to feed the elastic as shown below.
 8.  Attach a safety pin to the end of your elastic (that has been cut to measure your waist size).
 9.  It is helpful to pin the opposite end at the waist just to keep it from slipping in and getting lost!
 10.  Now, feed the elastic through the entire band and after you bring it back out on the other side, unpin the other end and take those two elastic ends and sew them together, as shown below.

 11.  Close up the waist band opening by stitching along the gap, 
making it line up with your previous seam.
12.  Now, turn the hem of each leg under 1/4" and sew.
 13.  Then, turn it under again about 1/2" and sew all the way around.
 Turn them right-side out and put them on. They are finished!


Pin It Now!

Skillet Cookies with White and Milk Chocolate Chips

Pin It Now!

Skillet Cookies with White and Milk Chocolate Chips

2 sticks of butter, melted
3/4 c. sugar
3/4 c. brown sugar
2 eggs
2 1/4 c. self-rising flour
1 1/2 tsp. vanilla flavoring
1 c. milk chocolate chips
3/4 c. white chocolate chips

Mix above ingredients and pour into well-oiled cast iron skillet.
Bake at 375 degrees for 8 minutes in small cast iron (heart shaped) skillet
or bake for 25 minutes in a regular cast iron skillet.


Pin It Now!

Chocolate Oatmeal Cookie Protein Shake

Pin It Now!

I make protein shakes and smoothies often but this one was exceptionally good and reminded me of those "counter cookies" or "chocolate oatmeal cookies" that you heat on stove and drop on wax paper.  You know the ones I'm talking about?  I will warn you, it's very thick, but you can add milk or ice, if you want it thinner. I've definitely found a new favorite protein shake!
Here's the recipe…

2 frozen bananas
1 c. 1% milk
1/3 c. quick cook oats, uncooked
2 tbsp. peanut butter
1 scoop of chocolate protein powder

Dump the ingredients into your blender and mix until smooth.
This recipe makes one 14 ounce drink.

Disclaimer: This is a healthy protein shake and does not contain cookies.  It just tastes like it does!
Pin It Now!

Valentine's Day Headband - Crochet Pattern

Pin It Now!

I used an "H/8" hook - 5.00mm
I used "Bamboo Spun" yarn in "pink" - found at Hobby Lobby. 

FIRST - FORM THE BAND...
Chain 8

ROW 1:  
1SC 1DC in second ch from hook, 
*skip next chain, 1SC 1DC in next ch, rep from* to end of row, 
ch 1 turn.

ROW 2
*skip next stitch, 
1 SC 1 DC in next stitch, 
rep from * to end of row, 
ch 1 turn.

Repeat row 2 until work measures 19" from the beginning.
(you may have to adjust according to your head size 
but just remember to make it small and tight because most yarn stretches.) 

My Tip - make this headband WAY TOO SMALL and it will fit just right!

Slip stitch beginning and ending edges together and fasten off.

You can find the tutorial for the crochet heart here.  (click photo to go to link)  
I attached the heart by slip stitching around the edge with red yarn.

Here's another cute headband tutorial… (click photo to go to link)


Pin It Now!

How To Crochet A Heart

Pin It Now!

This is such a fun Valentine's Day project that you can even teach your kids! These cute, little crochet hearts are perfect for a yarn necklace, a heart garland, a scarf attachment, a headband attachment… 
I could go on and on.
You can find the pattern for this Valentine's Day Headband here.  

Here's a complete picture tutorial for "How To Crochet A Heart"
I used a size H crochet hook.
A Tip... the larger the hook you use, the larger the heart will be.


Pin It Now!