Prayer List Printable - July
Another free printable for the Resolution Notebook.
Simply click on the image and it will take you to the download page.

Here are all of the monthly prayer list printables...
I made this sundress and have worn it several times now and just love it! I don't have a pattern but I will try to give instructions with photos. Email me if you have any questions. It's a really simple and fast project!


This is one of my favorite dresses that I used as a "pattern".


Then I cut 2 pieces of white fabric (the same size) for lining the dress.

I pinned the front fabric panel to the white lining with right sides facing.
Then I did the same with the back panel.


I placed the front and back sewn panels with right sides facing, then I pinned them. I held up the "dress" to see how high I wanted the slit to go up on the side, then I marked that measurement on both sides.

The next step was to take elastic (measuring 1/2 inch) and wrap it around my chest until it was snug. Measure/wrap where the top of the dress will begin. Then I stitched the ends of elastic together, using a zigzag stitch.


I pinned the elastic into the dress at center points - on the sides and front and back centers and then stitched the pinned areas. I folded over the elastic and hand stitched (using slip stitch) into the lining part of dress only, this way there's no elastic line showing on front of dress.

This next part has no photos and I apologize. I got caught up in sewing and just forgot completely.
I pulled the dress on and marked the place where I wanted the waist to be placed. Then I created two buttonholes at front and center and sewed two parallel lines for the waist tie pocket. Think pole pocket for a curtain panel!

I created a "tie" and threaded it through the belt button holes. I wanted it long enough that I could tie it in a bow.

I put on my favorite wedge sandals that I'd always be wearing with the dress and then pinned it at that hem line. I trimmed the excess fabric and then turned it in and pressed the seam. I stitched closely at the edge. I could've hemmed it the traditional way but this is the way I chose to hem this one.
Pin It Now!


SUPPLIES:
1. Placemat: I bought this placemat at Target for $3, it measures 14" x 19"
2. Zipper: 14-16 inches
INSTRUCTIONS:
Lay placemat face up - with the short end at the top.
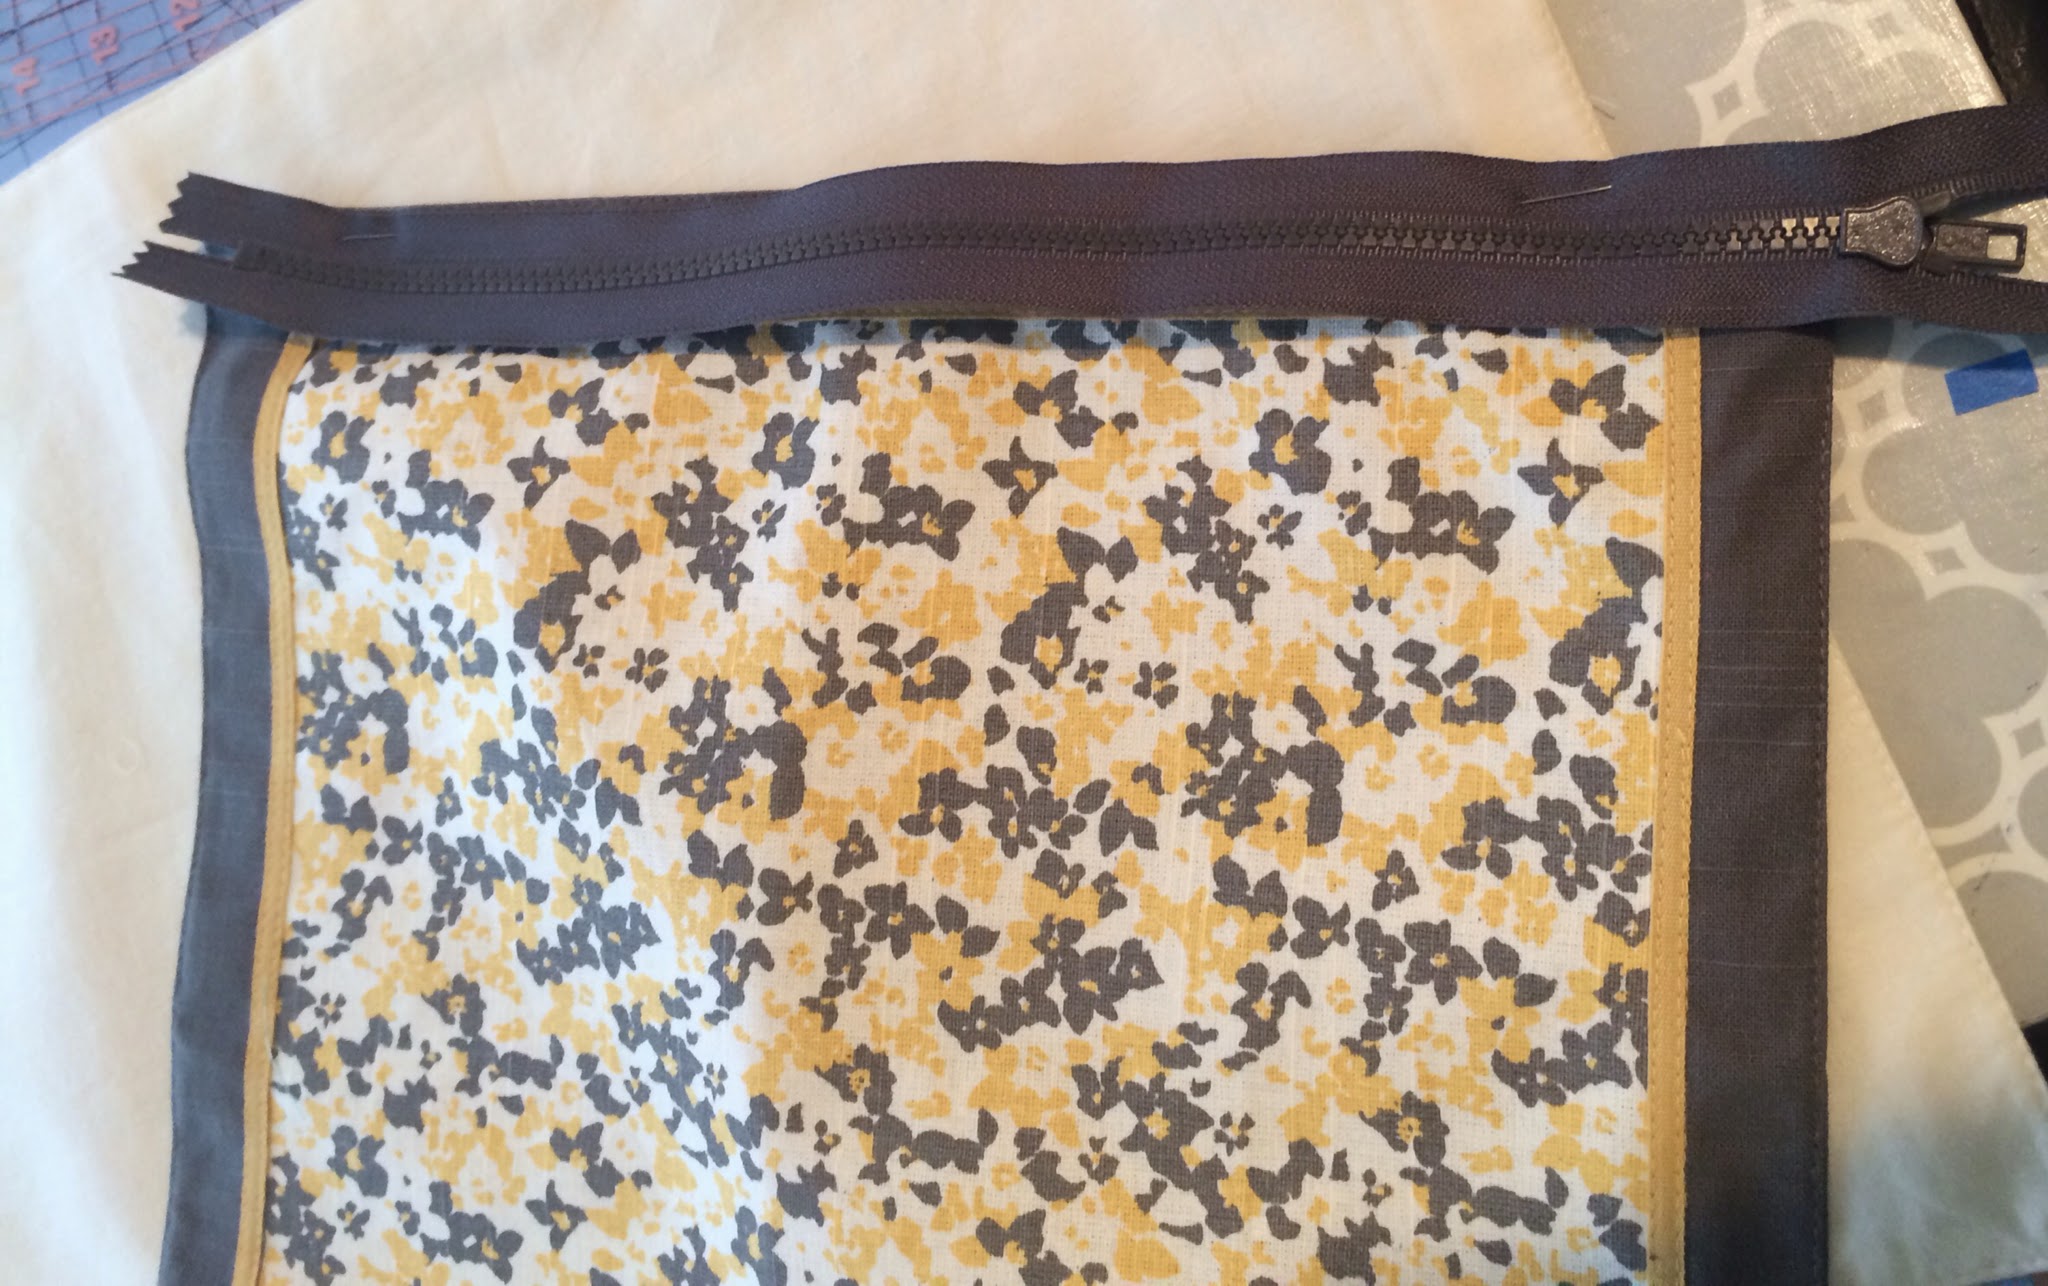
Lay 14-16 inch zipper face down - and pin to place mat as shown. So that right sides are facing (zipper right sides and fabric right sides.

Using your zipper foot on sewing machine, sew zipper where you pinned.

Now, unzip zipper and pin unattached side to the other short end of placemat - as shown in pic. Sew that side.


Leave zipper half way zipped and pin two sides closed, leaving the bag inside-out.

Stitch those two sides. If using a metal zipper stop at zipper and teeth or you'll break your needle. ***If using metal zipper, you'll need to come back and hand tack (sew a few stitches) over this area.***


Trim edge that you just sewed along with the zipper end pieces.

Now, it's time to cut some corners ;)

Measure and square off 1.5 inches in each corner. I used a pen to make marks, then cut those lines.


Repeat on all corners.


Your bag is finished.

Tie a pretty piece of ribbon to the zipper.
***Remember to stitch over zipper ends if you used a metal zipper***
This is the other bag I made from a Target placemat...

I made these in 30 minutes!
Happy Sewing!
Pin It Now!


